The ContinuumBridge Portal
The ContinuumBridge portal is your view onto what apps and devices are installed on your bridges. It allows you to "discover" devices and add apps that can use them. The paragraphs below take you through this process using the Demo Switch App example.
Logging-in
On any computer, open a browser and press the "Customer Login" button on www.continuumbridge.com, or navigate to:
http://portal.continuumbridge.com/
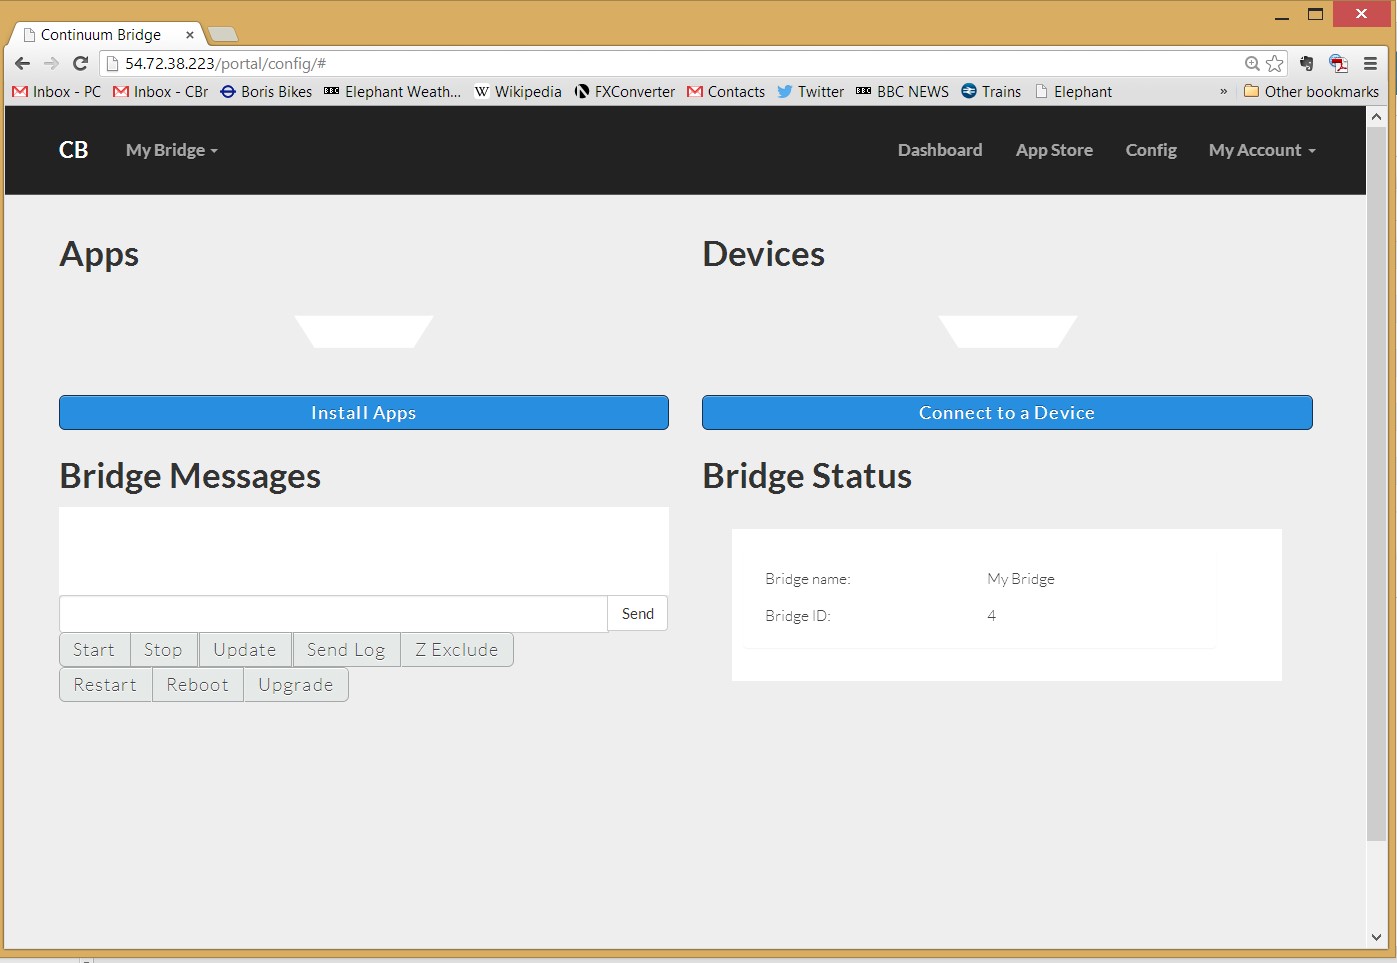
Once you have logged-in, your browser should look similar to the picture below with name of your bridge near the top-left of the screen (in this case, “My Bridge”). In the future, this portal will be developed into is a development portal and a user portal, but for now this is essentially a proto-development portal.
Adding bridge-apps
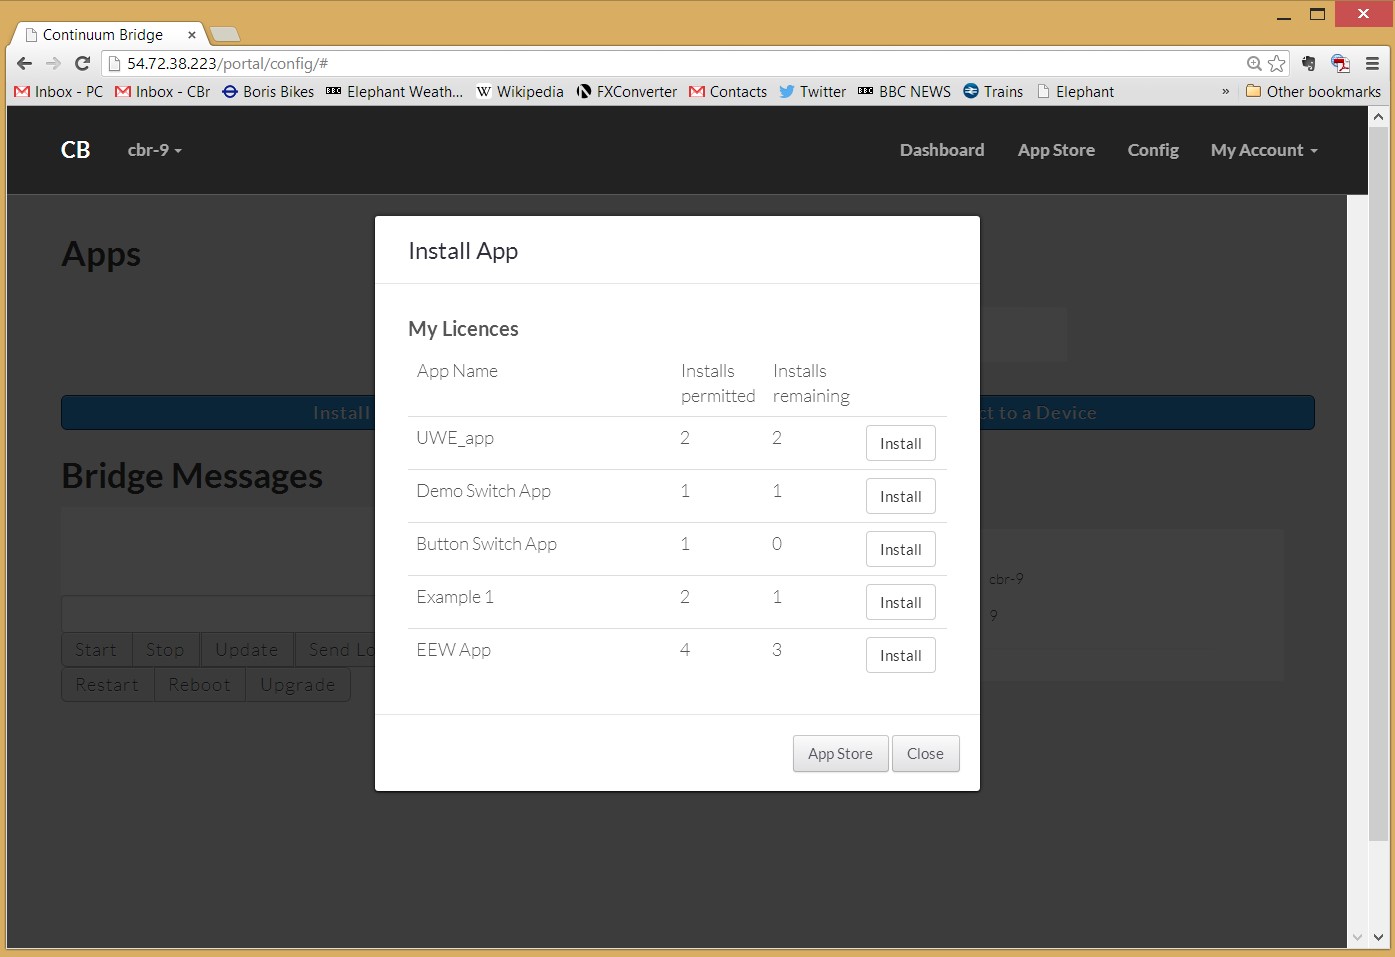
Click on the Install Apps button. A pop-up will appear similar to that shown below. From this, install Demo Switch App and press close. The app will appear in the list of apps on the left of the browser window.
No apps?
A few default apps are installed when you create a new bridge. At present, this sometimes does not happen. If you don't see any, please email us at info.continuumbridge.com and we'll fix it.
"Discovering" devices
Now ensure that the devices that you want to use are on. Z-wave devices are generally included in a network by either pressing a button once or three times. Refer to the instruction of the specific device. Now press the “Connect to Device” button, and do whatever is required to your device to put it into discovery/inclusion mode. After a delay of up to 30 seconds, the display will show any devices that have been found. Status updates and instruction are displayed in the Bridge Messages window. An example of this is given below. Here a Vision Security 258 Z-wave device has been found, along with two devices mysteriously named “Continuum”, which are actually TI Sensortags that have been reprogrammed by ContinuumBridge.
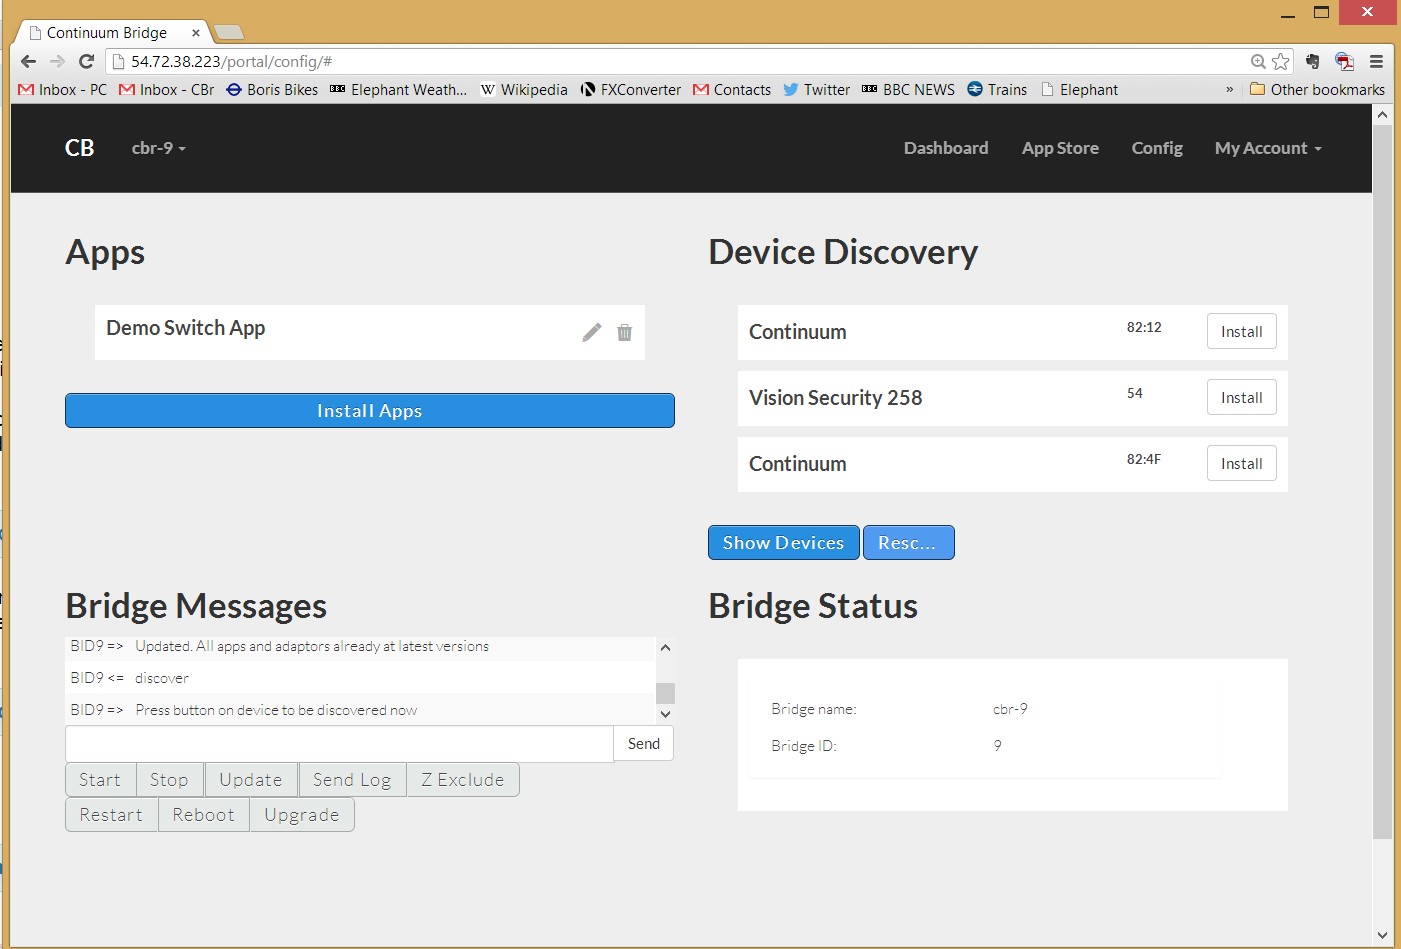
Only one device may be installed at a time. With Z-wave devices, only one will be displayed. With Bluetooth devices, you may see many and a lot of devices (eg: some smartphones) will appear, but only try to install the device you are intending to install.
Z-wave devices
Make sure the device is within a few metres of the bridge before trying to discover/include it. Once it is installed on the bridge, you can move it away.
Sometimes you may see a status message saying that a Z-wave device has been found, but then it is not identified. This can occur for a number of reasons, including a poor radio connection. If this happens, press the Z-exclude button on the portal and then the include/exclude button on the device (in accordance with the manufacturer's instructions). Then try again.
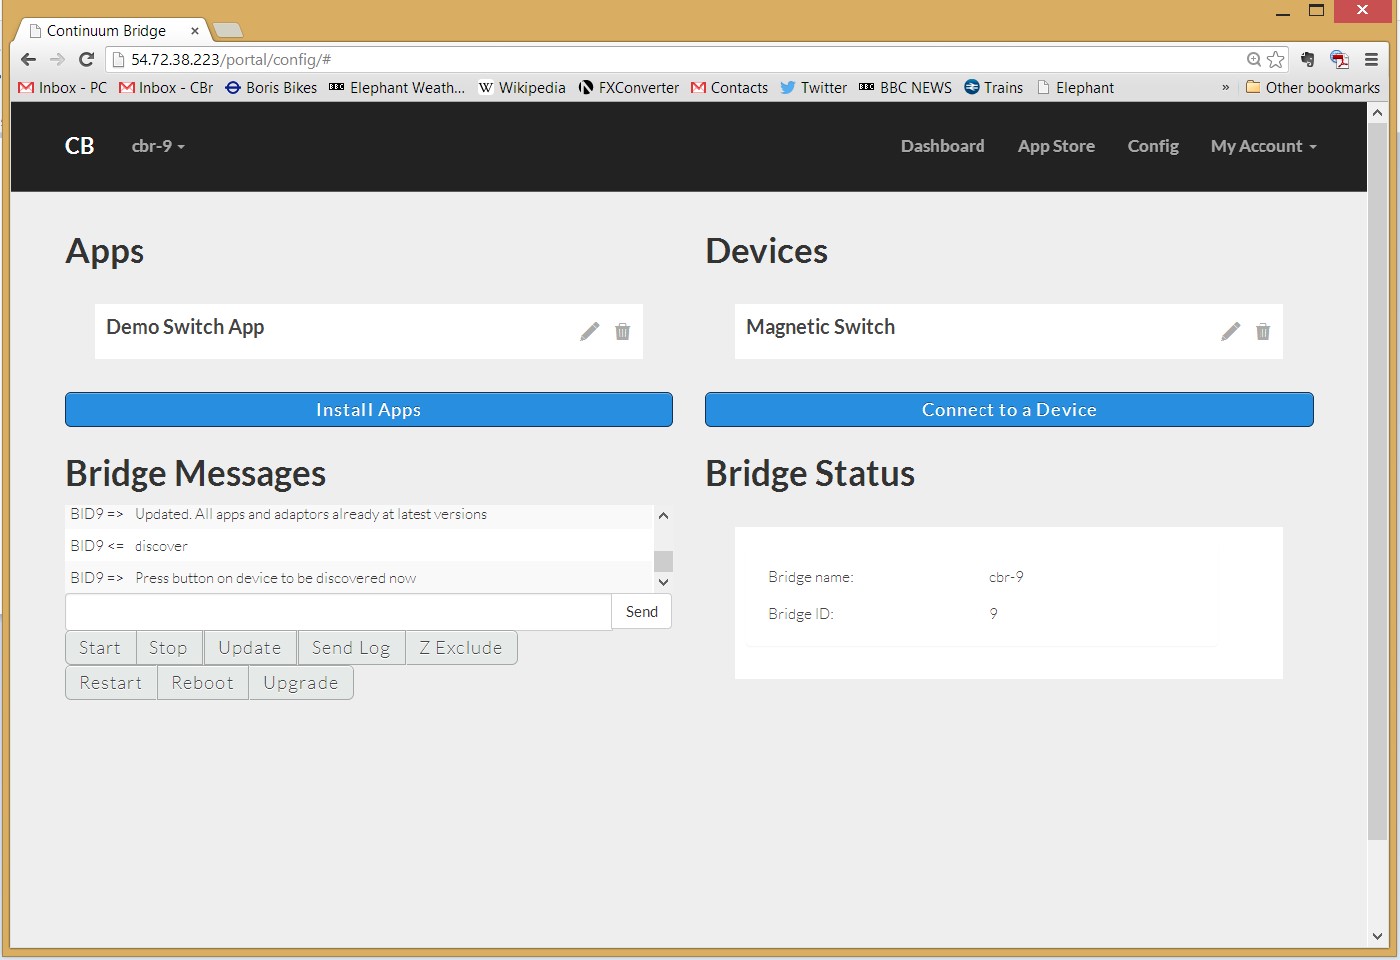
The display below shows what happened when we clicked on the “Install” button of the Vision Security device and gave it the name “Magnetic Switch”.
Friendly names
We find it useful to give our devices names that we can remember, such as "Front Door Magnetic Switch", for a magnetic switch that's on the front door. Then it's easy to work out which devices you want to connect to an app.
The Update button
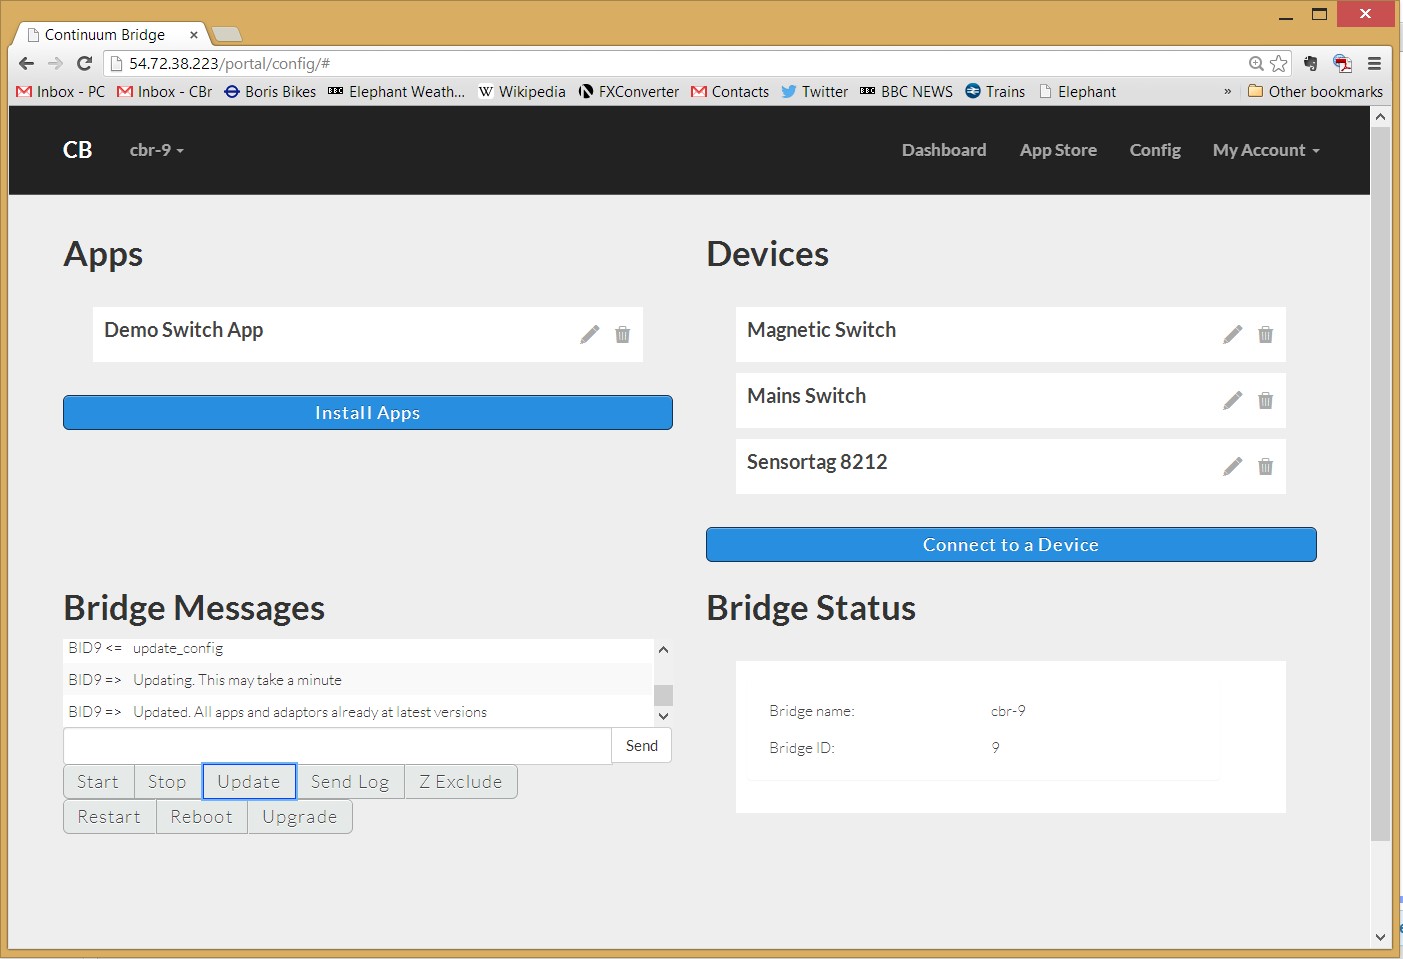
In the current version of the platform, information about apps and adaptors is not sent to the bridge (Raspberry Pi) until the “Update” button in the group of buttons on the bottom-left of the screen is pressed, so press this. This will also cause any new apps and adaptors to be downloaded to the bridge if they are not already installed on it.
Now, repeat the “Connect to a Device” and installation process for other devices, remembering to press the “Update” button each time. The figure below shows the display after a mains switch and a “Continuum” Sensortag have been installed
What are those letters and numbers after Bluetooth device names?
They're the last 4 digits of the Bluetooth address. In some cases, this can be useful in identifying devices, if you have lots of the same sort of Bluetooth device. If this doesn't apply to you, just ignore them.
Connecting devices to apps
Device permissions
A key benefit of the ContinuumBridge platform is that you, the user, own and control your devices or appliances and you decide which bridge-apps you want to be able to see them. The permissions are given by connecting devices to apps as described in this section.
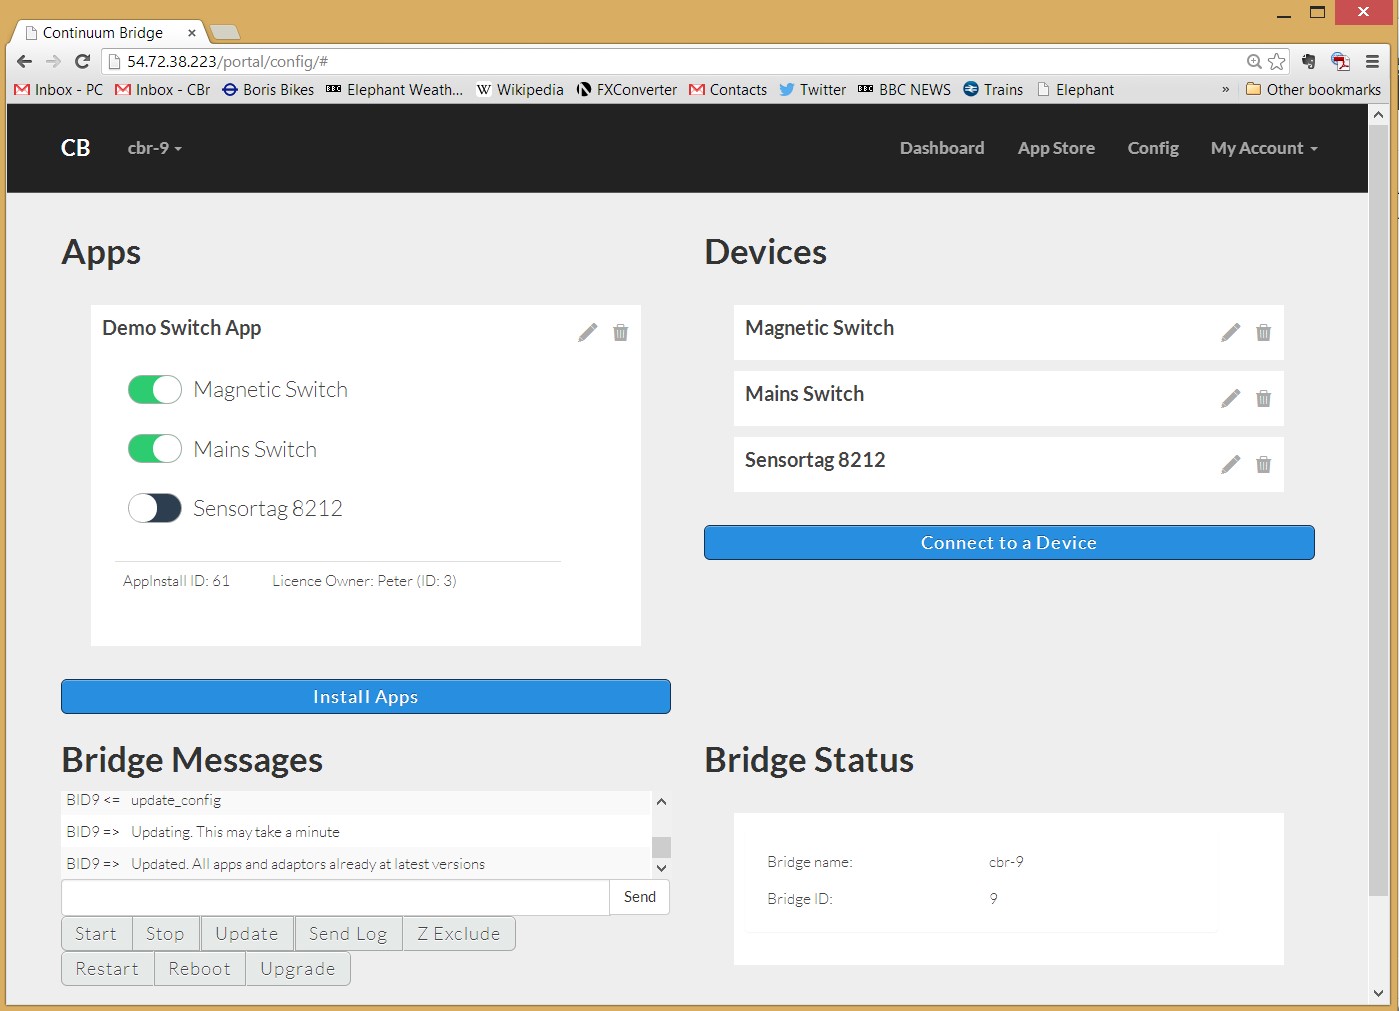
Click on the pencil next to the Demo Switch App. The resulting screen will be similar to that shown below. This shows that all three devices that have been installed can be connected to the app. In the display shown here, two have been connected, but just connect however many you have. Once you have done this, click the "Update" button and then the “Restart” button in the buttons area in the bottom-left of the browser window. You will see various messages in the Bridge Messages window. After the bridge has started, you will be able to either trigger the sensor or press a button on the Sensortag and the mains switch will turn on or off accordingly.
Congratulations
You've connected devices to an app and got them to do something. This is a very simple example, but even with a few simple devices you can make it do lots more, just by editing the code.
Things to remember
This is an alpha version of the ContinuumBridge platform and is intended primarily for developers. Subsequent versions will have a far cleaner user interface, but for now, if things aren't going as you expected, remember:
Always press the Update button on the portal when you have made any changes.
Most changes won't take effect on the bridge until you have pressed Restart.
Installing Z-wave devices can be a pain. See the notes above.
Updated less than a minute ago
